Create A Festive Cocktail Using Photoshop 3D Capabilities
Step 1
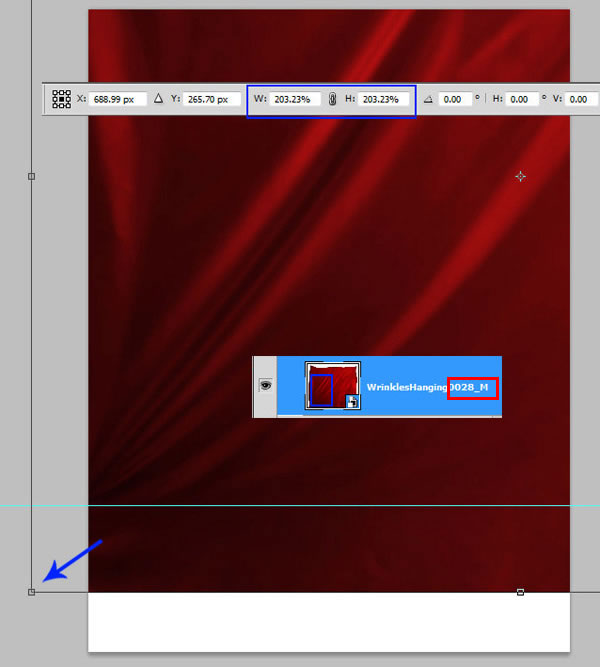
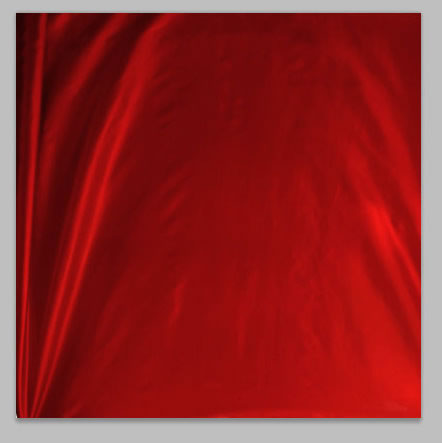
Create a new document, the size is 768x1024px. Insert fabric image,
we will use this texture to create background. Apply Flip Horizontal
transformation to it. Go to edit > Transform > Flip Horizontal.
Then expand the layer proportionately, press Shift as you drag a
corner handle to scale. Choose Edit > Transform > Scale. You
should have visible just the drapery left bottom part of the image.
Step 2
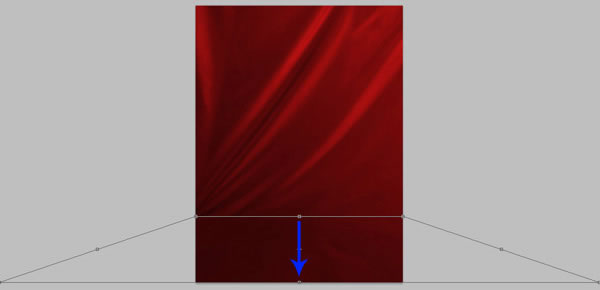
Select the bottom part of the red fabric just like on the example, use Rectangular Marquee Tool

.
Copy and paste it into a new layer. Then go to Edit > Transform >
Perspective. Drag one of the bottom corners handles to apply
perspective transformation. Then choose Free Transformation and move
bottom edge of fabric shape to the bottom edge of Photoshop document.
You should completely cover the white background space.
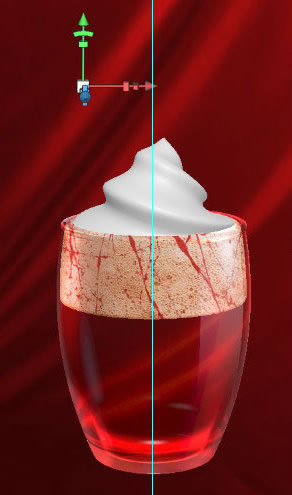
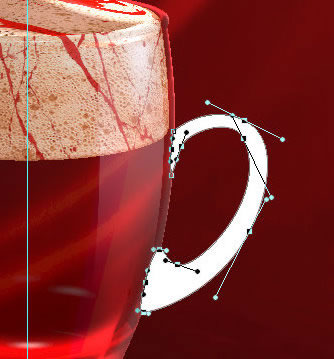
Step 3
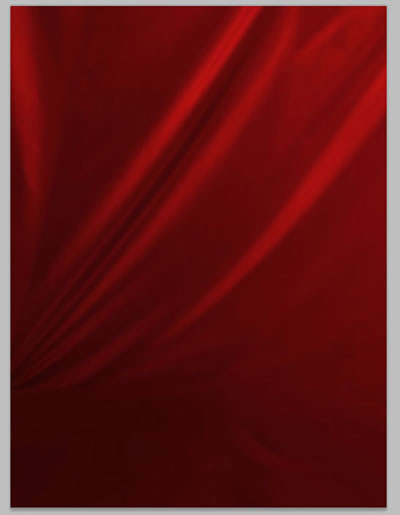
You will get similar result.
Step 4
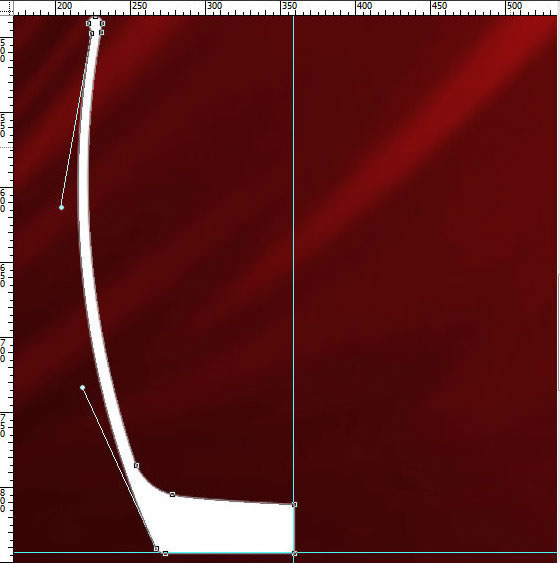
Create glass wall silhouette. You may use Pen Tool

in the Shape Layer Mode

.The
size is 145x359px. It should be a half of full glass shape silhouette.
You may create you own shape, but keep right cross edge vertical and
bottom line horizontal – check out the guides on the screen shot. Do not
rasterize created shape.
Step 5
Open 3D Tools palette. And create a new 3D object from the glass silhouette path.
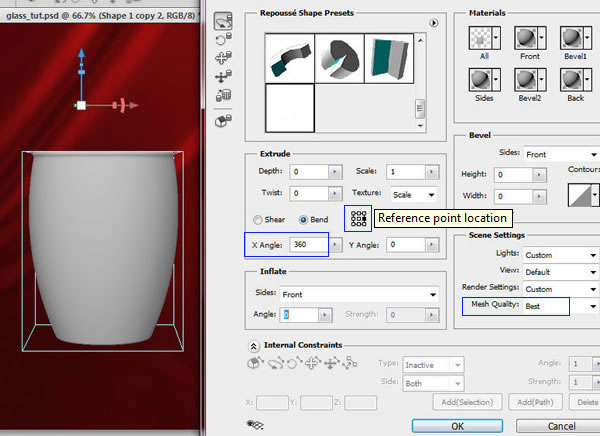
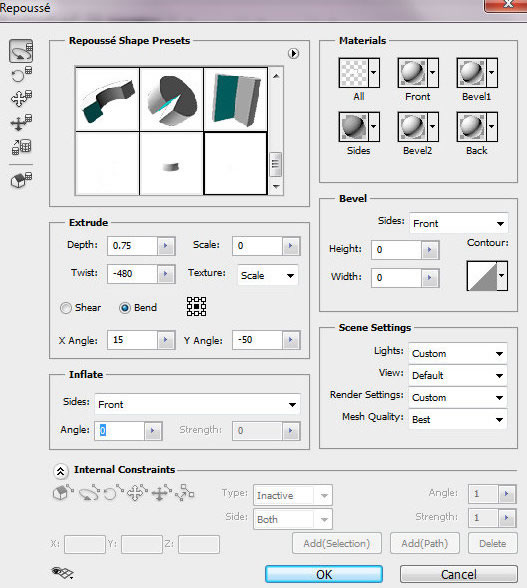
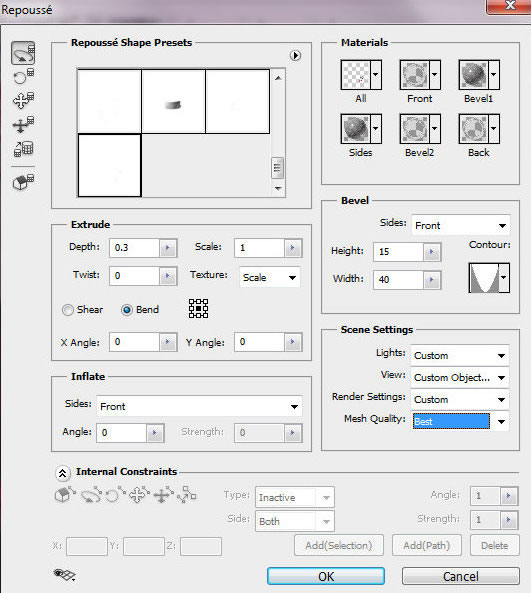
Step 6
You will see the 3D settings window. Apply adjustments like on the
screen shot below. Especially pay attention to "Reference point
location"

click on right point to choose right spinning axis. Our shape should
spin around inside edge with Angle 360° . Choose Best Mesh Quality.
Click "Ok".
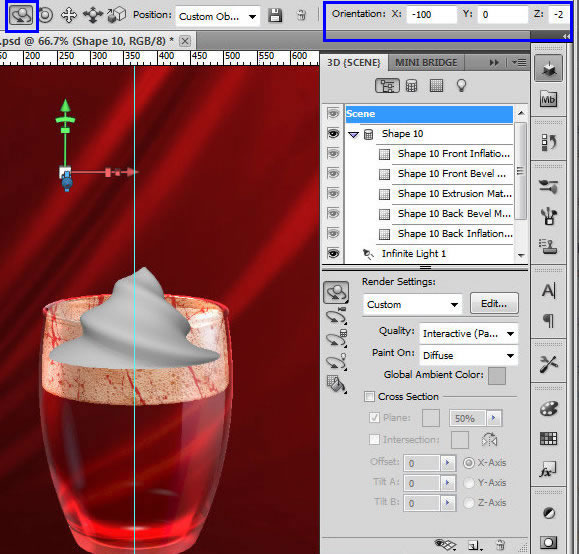
Step 7
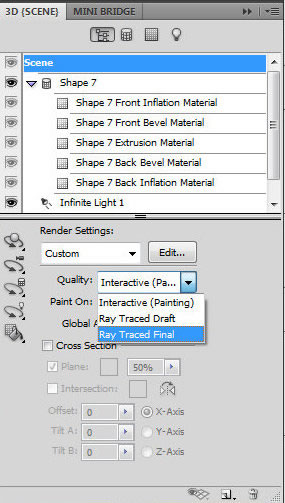
Tilt down 3D perspective a bit. Make active "Rotate the 3D Object Tool"

and adjust only "X" Orientation setting (-10). Keep "Scene" Render Settings like on the screen shot.
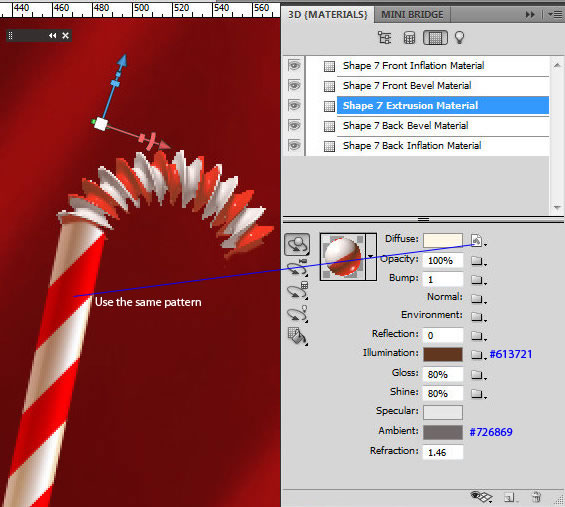
Step 8
In order to set materials for the glass cup, make active "Materials"
palette. In this tutorial we will use only Extrusion Material (marked
with green color) for the most of the shapes. That’s why the Opacity
parameter for all other materials should be 0% (!). So, set Opacity = 0%
for the "Front Inflation Material", "Front Bevel Material", "Back Bevel
Material", " Back Inflation Material".
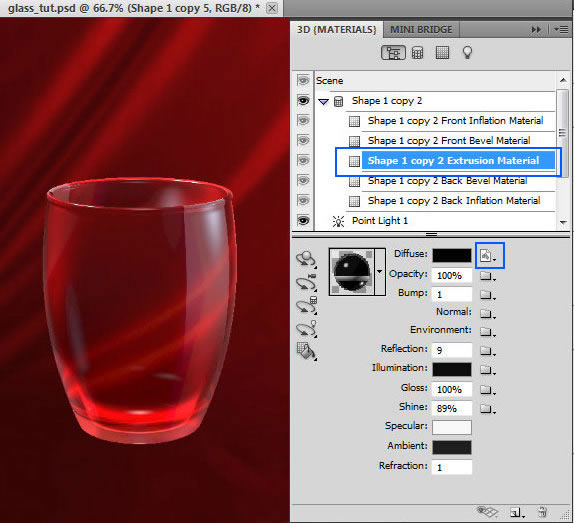
Step 9
Apply following settings for the Extrusion Material. Upload texture
for Diffuse Parameter by clicking small folder icon. I used another
Fabric
(Image 7) texture, cropped as the square 1000x1000px and flipped by
vertical and horizontal. You may play with Opacity, Gloss, Shine etc
settings to see how 3D effects change.
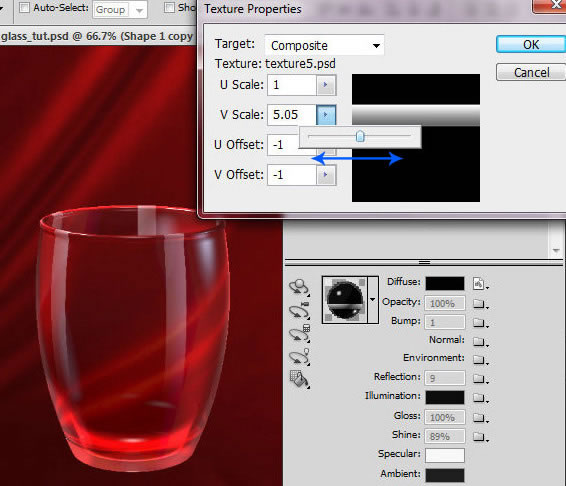
Step 10
To change texture position Right click Diffuse icon and choose "Edit
Properties". You may play with Scale and Offset settings (use the
scrubby sliders) to find better texture position or use settings like on
the screen shot.
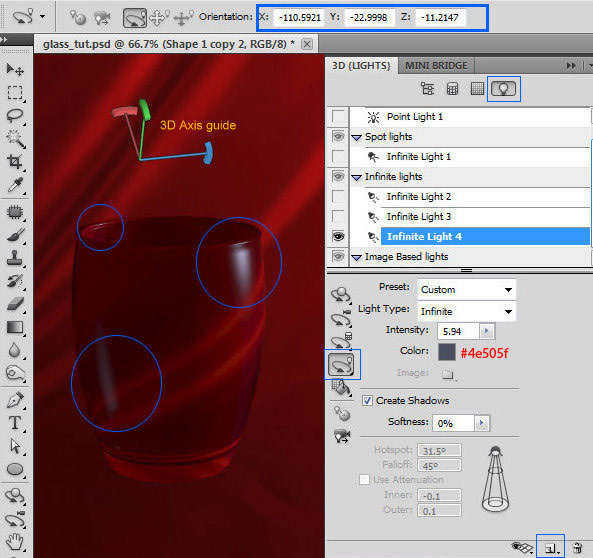
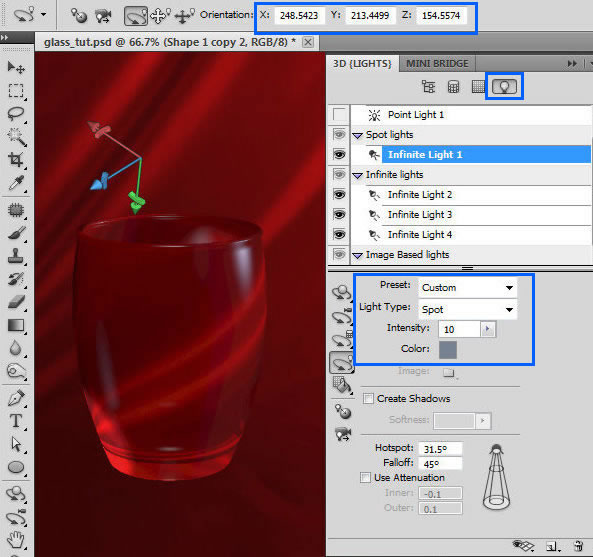
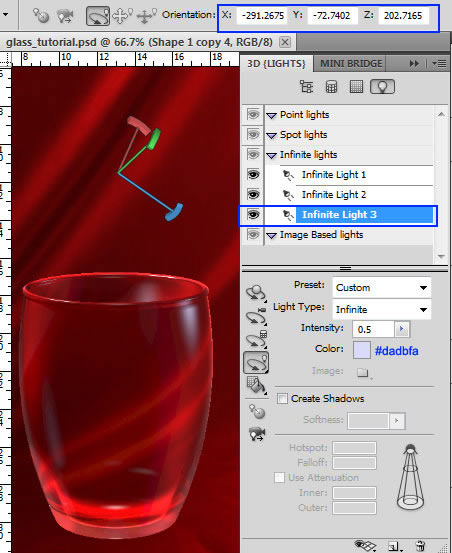
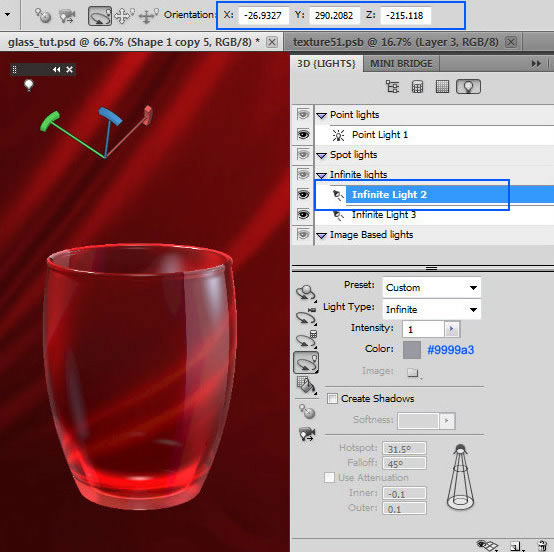
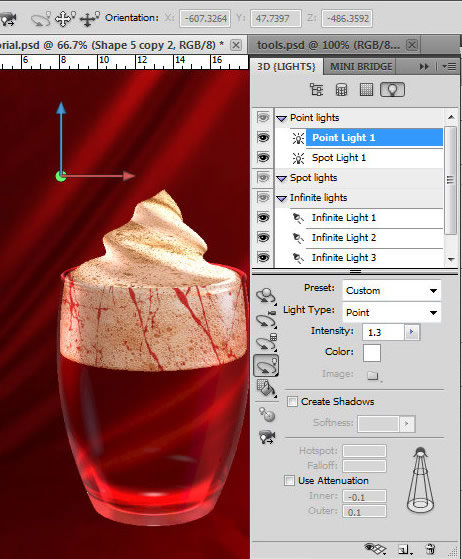
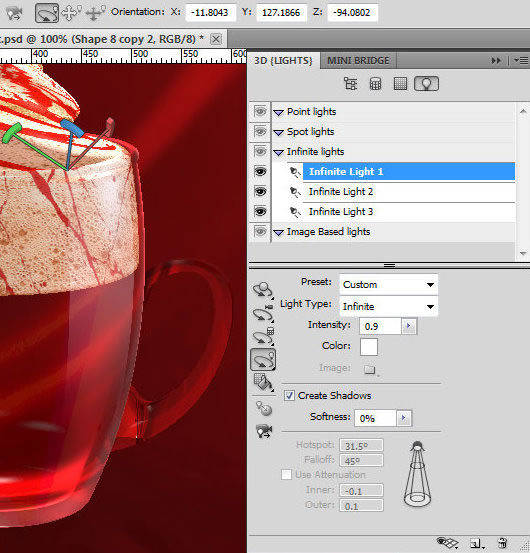
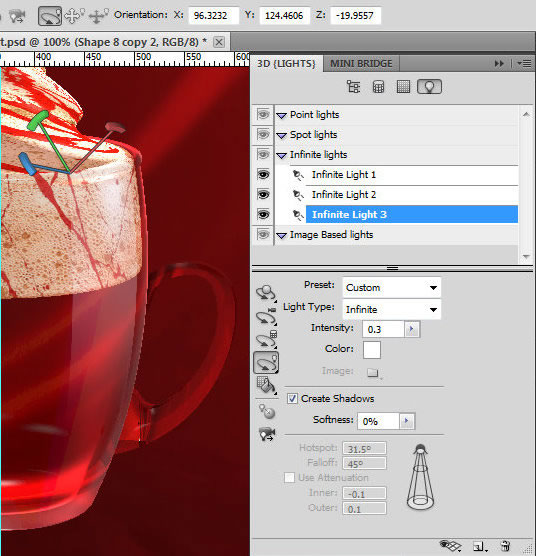
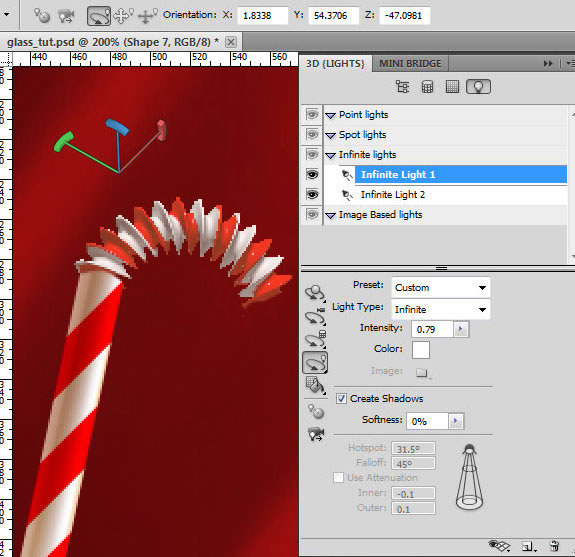
Step 11
Open Lights palette to add a light, click the Create A New Light button

,
and choose the light type from the drop down menu. You may start from
"Infinite light" with adjustments like on the screen shot. Find Light
position settings in the top part of screen shot or apply your own by
rotating 3D Axis guide. To view Axis guide click the Toggle
icon

and select 3D Axis.
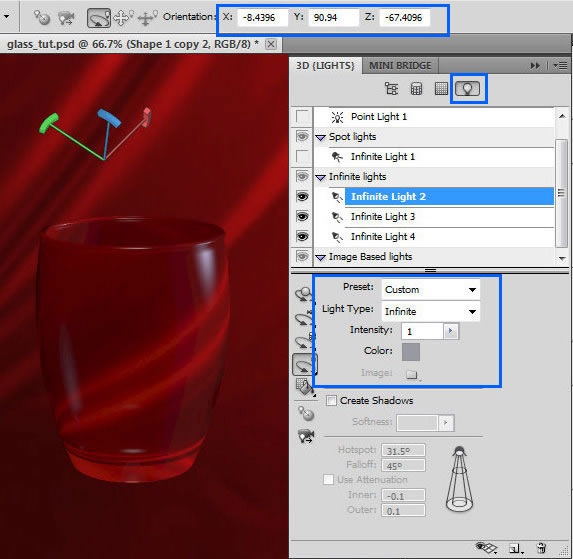
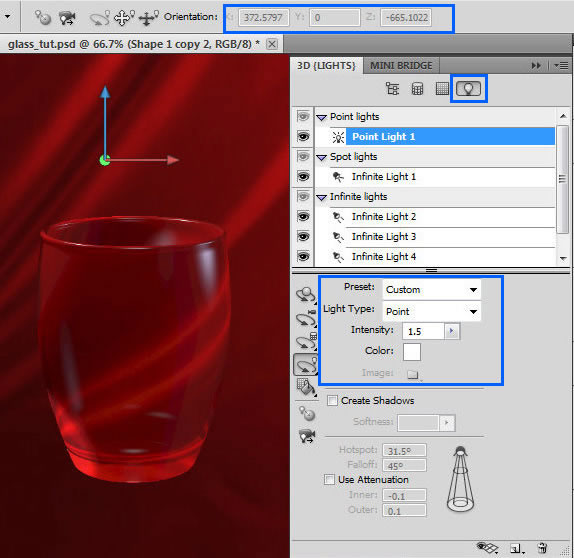
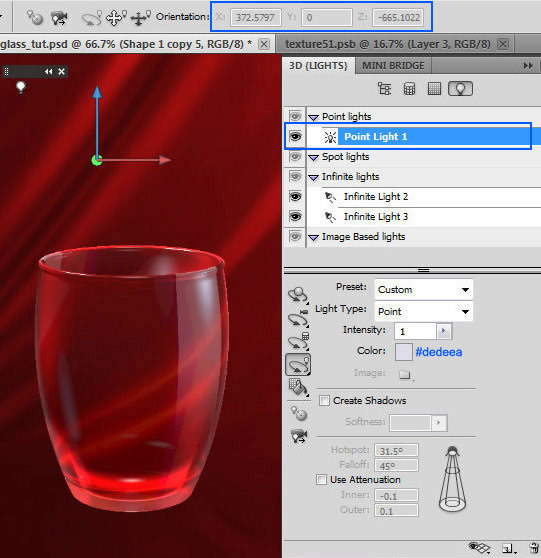
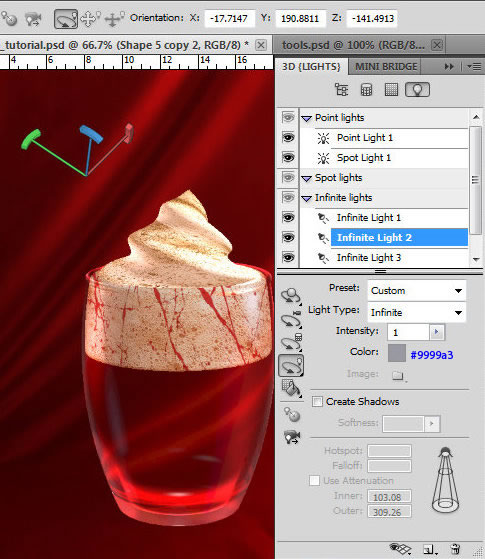
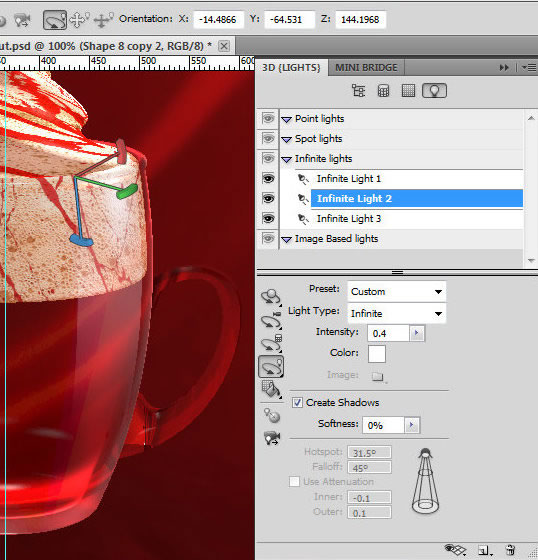
Step 12
You may find the rest of lights settings for this glass shape on following screen shots.
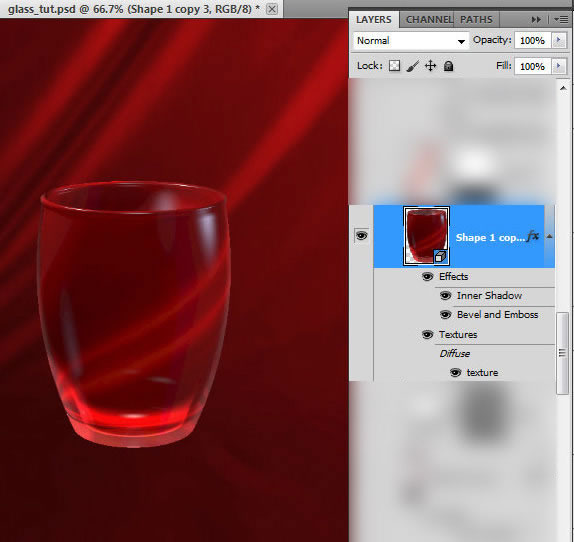
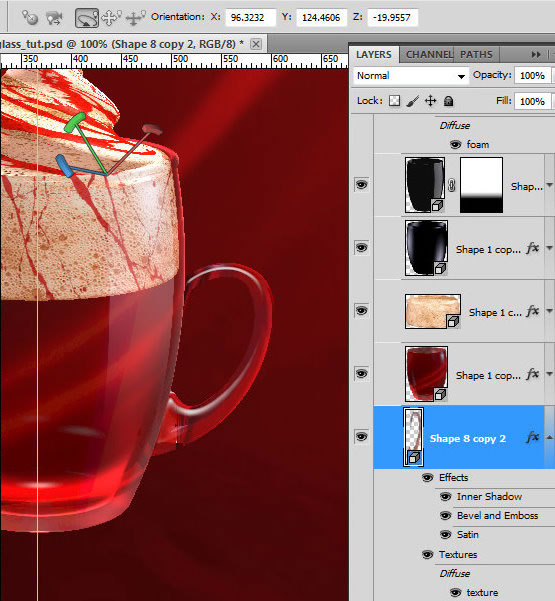
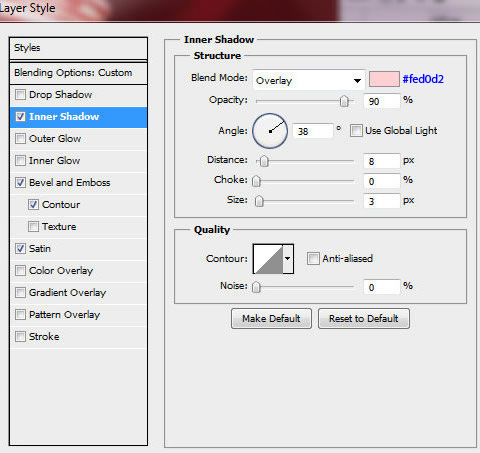
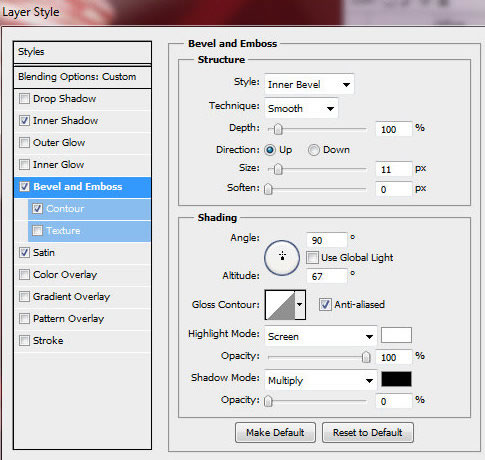
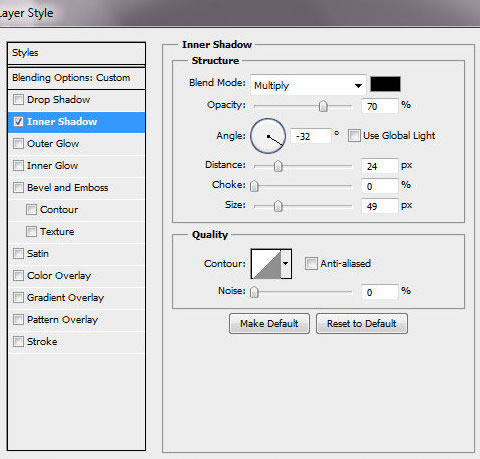
Step 13
Apply Inner Shadow and Bevel and Emboss layer style effects to created 3D glass object.
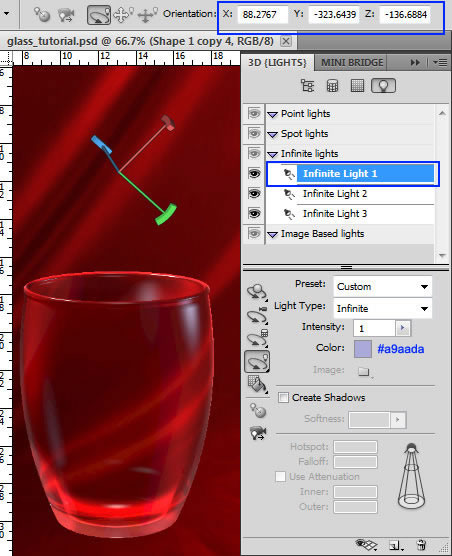
Step 14
Duplicate created 3D glass layer. Change Extrusion Material setting
for this layer. Remove texture and apply black color to Diffuse
parameter. Adjust lights settings.
Step 15
Return to the Layers palette and apply Color Dodge Blending Mode and Fill = 60%. Add Inner Shadow effect.
Step 16
In order to create large streamline light reflection, duplicate
previous 3D glass shape. Apply Screen Blending Mode to this layer and
Opacity 70%. Add Layer Mask, click small

icon in the bottom of Layers palette. Fill Layer Mask in the bottom part of the glass with Black and White gradient.
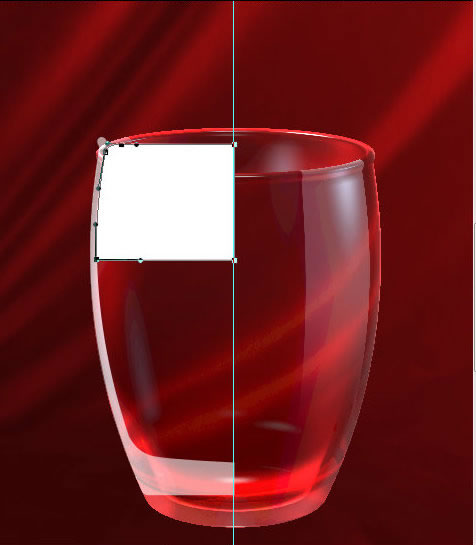
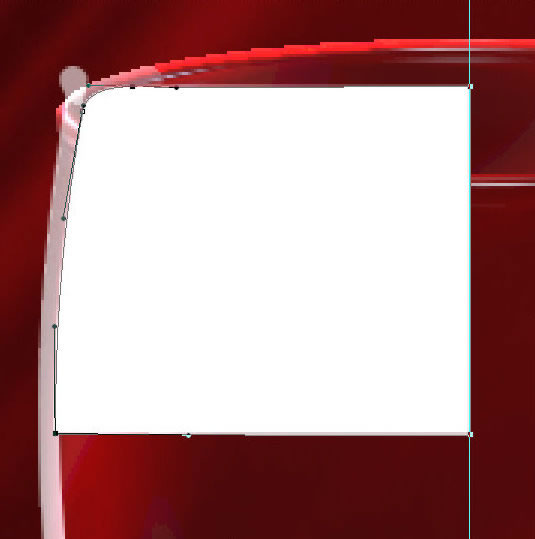
Step 17
Open materials palette and upload the new texture to Diffuse map. It
should looks like a black square with white horizontal line. You may
fill the line with white/gray gradient, just like on the screen shot.
Play with texture properties to move it on the right side of the glass
shape. You may see how light spot position changes with different
texture properties, check out the last screen shot.
Step 18
Apply following light settings to the shape with light reflection.
Step 19
Draw a new shape for the foam inside the glass. The size is 139x117px.
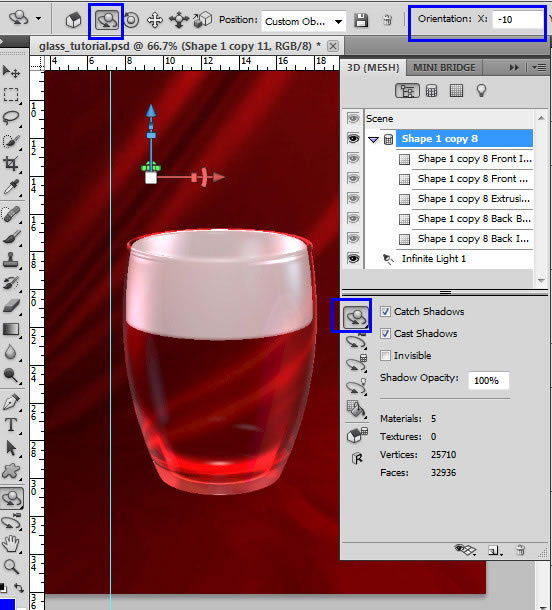
Step 20
Create the 3D object just like in the previous actions with the glass
shape. Use the same Repousse Shape settings and set X Orientation "-10"
to apply the same perspective as for the glass shape.
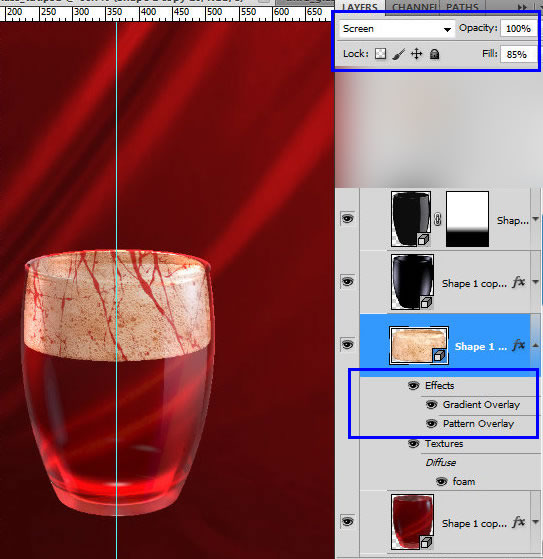
Step 21
Place foam layer above first glass 3D shape and below the second one.
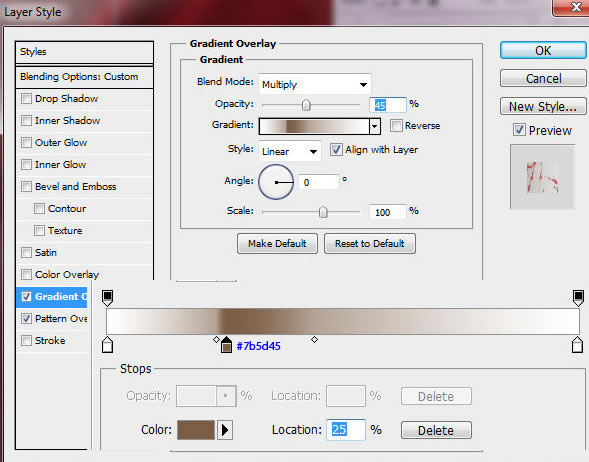
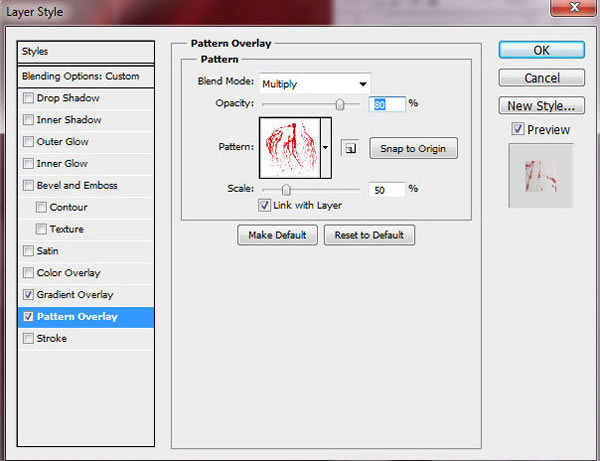
Choose Screen Blending Mode and Fill = 85%. Apply Gradient Overlay
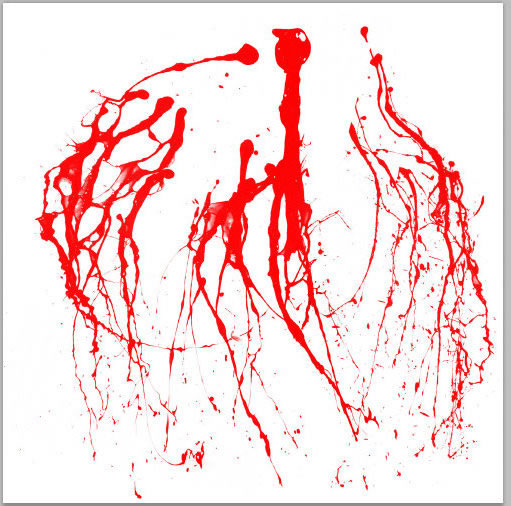
layer style effect and Pattern Overlay effect. In order to create this
pattern, make a new Photoshop document 1000x1000px with the white
background. Insert several layers with different splatters, choose
Multiply Blending Mode for each splatter layer. Flatten layers, go To
Edit > Define Pattern. Also, save created texture as JPG or .PSB to
use splatter texture for swirl cream 3D shape in the future steps.
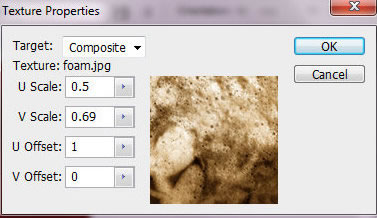
Step 22
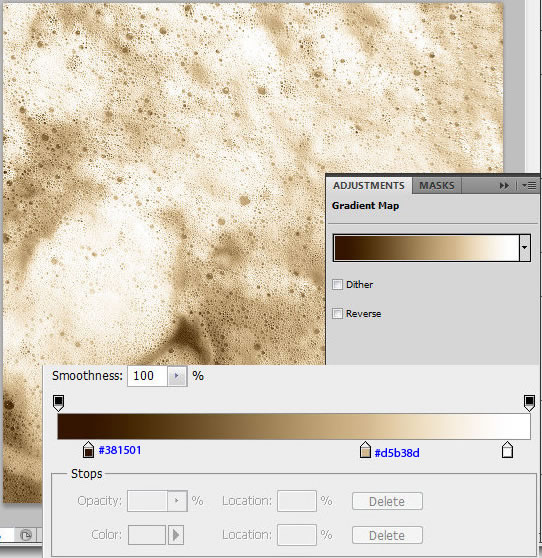
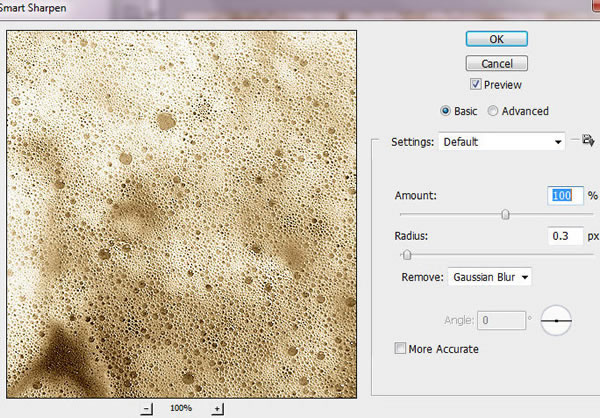
Prepare foam texture. Open original foam image and crop square area
1000x1000px, choose the area with small brown bleed lines. Apply
Gradient map effect to this image. Image > Adjustments > Gradient
Map. Then add Smart Sharpen effect. Filter > Sharpen > Smart
sharpen. Save created image as.JPG or .PSB.
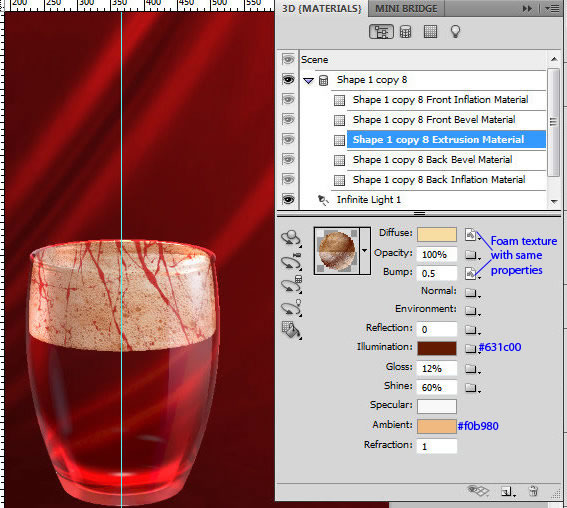
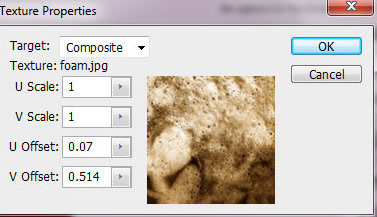
Step 23
To make spongy foam effect apply following settings and created
texture to the Extrusion Material. Upload to Diffuse and Bump parameters
the same foam texture with the properties just like on the second
screen shot.
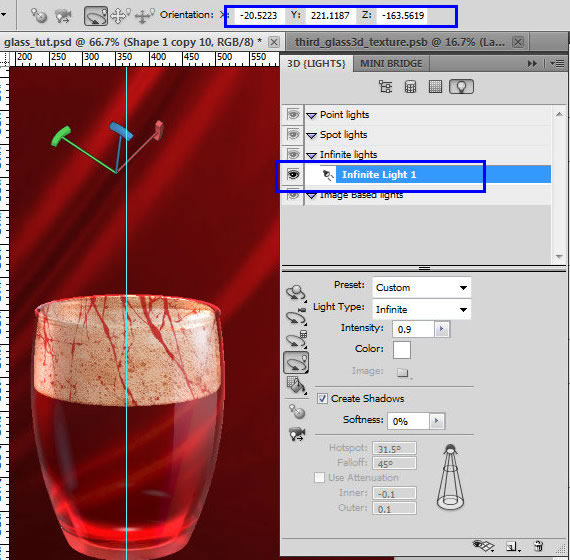
Step 24
Apply Light setting.
Step 25
Draw oblateness ellipse using

Ellipse Tool in Shape Layers Mode
. Create a new 3D object once again.
Step 26
Use following settings, Mesh Quality should be the Best. Adjust
Orientations settings, you may find them on the second screen shot. Move
the shape on the top of the glass with Move tool

.
Step 27
Apply Material settings, upload the same foam texture as for the
previous shape with the texture properties like on the second screen
shot.
Step 28
Set light effects for the swirl shape.
Step 29
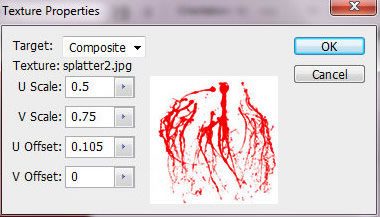
Duplicate swirl cream 3D shape, apply Multiply Blending Mode to it.
Use splatter texture from Step 21 to upload it into Diffuse map.
Step 30
Create the cup handle shape using Pen Tool
in the Shape Layer Mode
. The size is 128x198px.
Step 31
Convert it to the 3D object with following settings, use Bevel effect
for this shape. Apply the same map settings to the "Extrusion Material"
and "Front Bevel Material" as for the first glass 3D shape(red glossy
shape, Step 9).
Step 32
Adjust light effects.
Step 33
Move handle layer below all glass layers and apply layer style effects.
Step 34
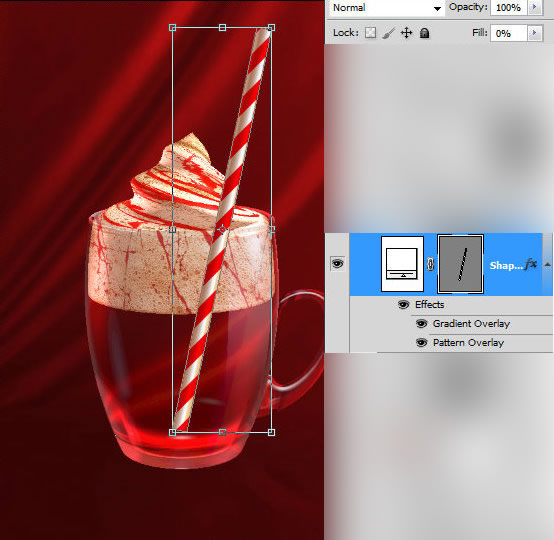
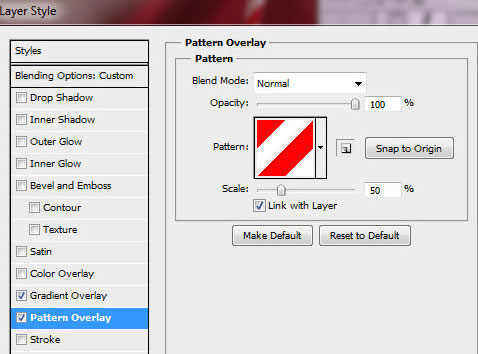
Draw the straw shape with Rectangle Tool, rotate it a bit – around
12° . Apply Gradient and Pattern Overlay layer style effects.
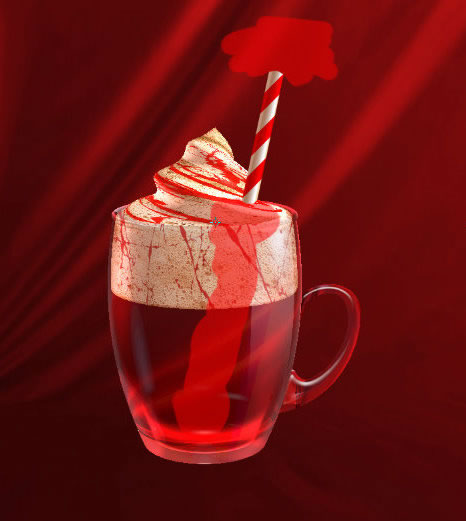
Step 35
Rasterize straw shape and duplicate it. Use one of the duplicates for the top part of straw. Erase marked areas.
Step 36
Make active second copy of straw shape, tilt down it a bit, erase
area above the foam texture. Put layer above first glass 3D shape, apply
Opacity = 80%, add Layer Mask and fill it with Black and White linear
gradient in the bottom part of the straw.
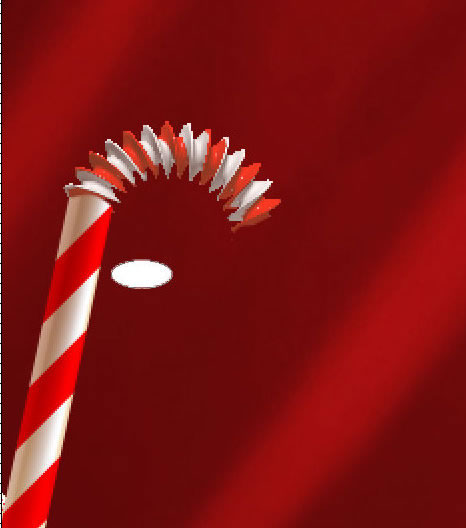
Step 37
In order to create springy part of the straw, draw a small ellipse
and convert it to 3D object. "Best" Mesh Quality is very important for
this complicated shape.
Step 38
Rotate this shape, or you may put Orientation settings like on the
screen shot. Adjust Extrusion Material, use red diagonal pattern for
diffuse map, the same as for the straw.
Step 39
Adjust light settings.
Step 40
Copy small part of the straw and place it above crated shape and rotate like on the example.
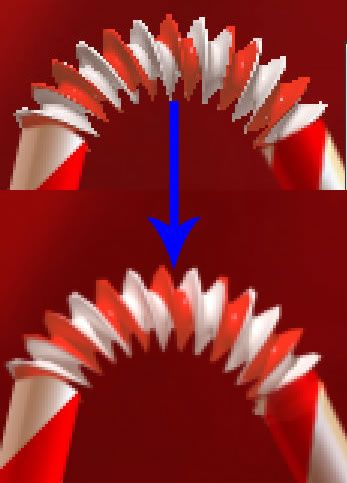
Step 41
In order to improve 3D objects appearance and smooths contours apply
Ray Traced Final Quality to all 3D shapes. Make it in final. Merge all
glass layers after rendering. Make small ellipse selection on the cream
surface around the straw and process this spot with Burn Tool

.
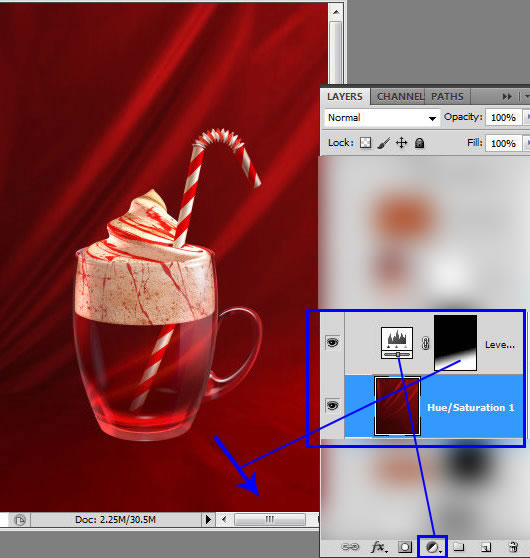
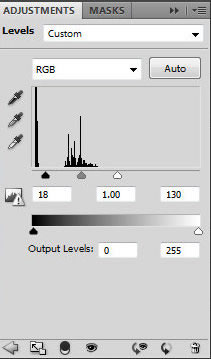
Step 41
Lighten bottom right part of the background using Levels settings. In
order to apply these settings just to the bottom area, fill Adjustments
layer mask with Black and White gradient, with the angle around 100°.
Step 42
Duplicate merged glass layer, apply Flip Horizontal transformation to
the duplicate. Move it down. Add Layer Mask to this layer and fill
bottom part of Layer Mask with the Linear Black and White Gradient.
Step 43
Insert Wood texture, load selection for this shape, use Command Ctrl + Click layer thumbnail, copy selected area.
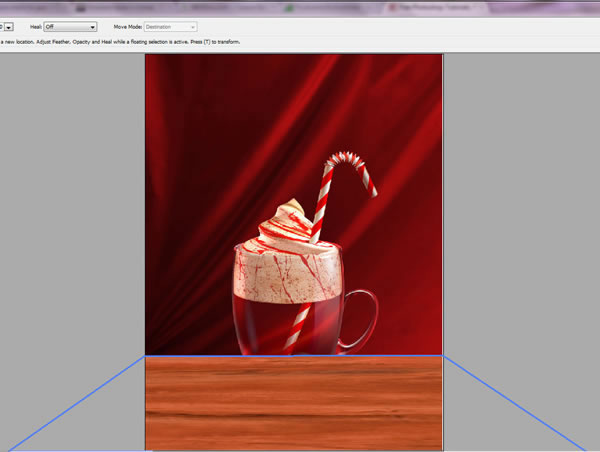
Step 44
Create a new empty layer above red background, go to Filter >
Vanishing Point. Take "Create Plane Tool" and make plane like on the
screen shot, use Ctrl + V command to insert copied wooden texture, drag
it to created plane, then click "OK".
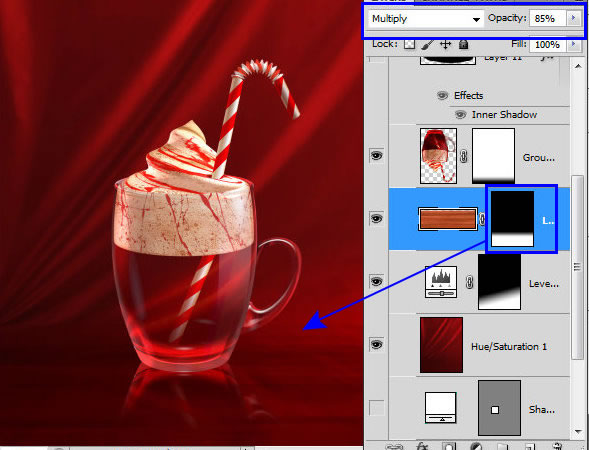
Step 45
Apply Multiply Blending Mode to the Wood Layer, add Layer Mask and
fill it in the top part with the Linear Black and White Gradient to make
smoother far wooden edge.
Step 46
Create a circle under the cup to make shadow effect, apply Overlay Blending mode, Fill = 0% and Inner shadow layer style effect.
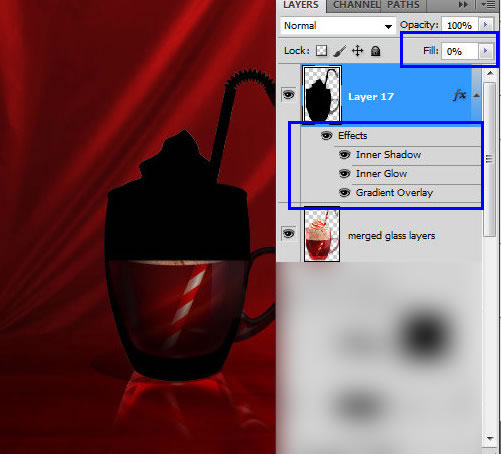
Step 47
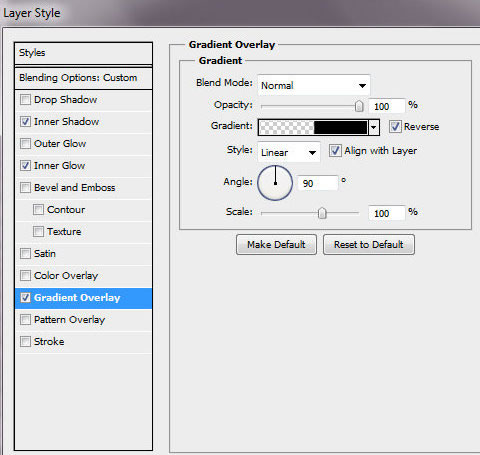
Load selection for the original merged glass shape and fill it with
any color in a new layer, apply layer style effects to this shape to
create black glass silhouette with transparent liquid area, don’t forget
to fill with black color straw area inside the glass. Merge created
shape with the new empty layer.
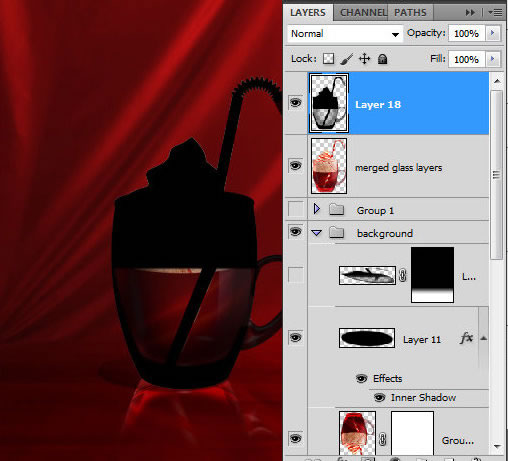
Step 48
Apply Free Transformation to shrink the created shape by vertical and
Skew Transformation to move top edge left. Edit > Transform >
Skew.
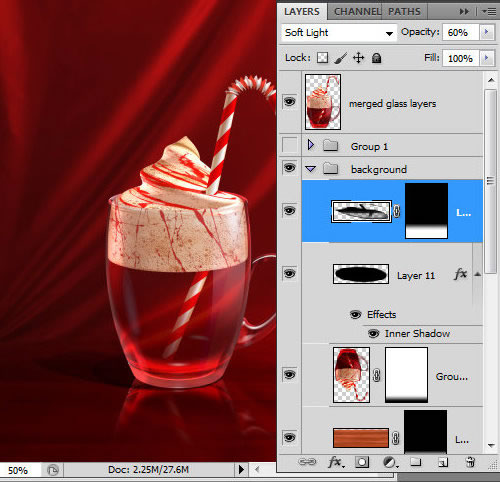
Step 49
Apply Soft Light Blending Mode and Opacity 60% to this layer. Add
Layer mask and fill top part of shadow with gradient just like in the
previous steps.
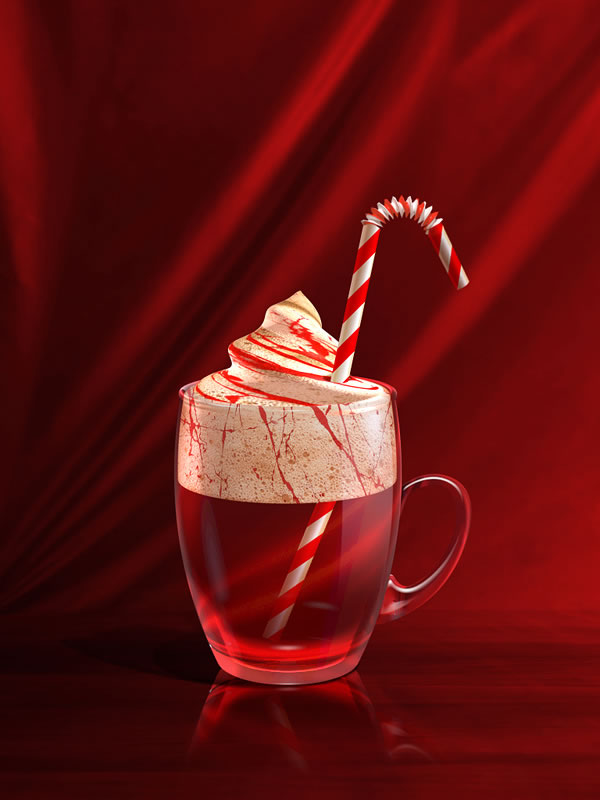
Final Image
 www.tutplus.com